The Full Story
I have been requested to rebuild this book posting the stages online. That proved to be difficult. Its actually easier to do the steps than describe them, which it does become wordy I have proceeded to analyse this book prior to binding with a description of the faults, and the reasons why I will do the works on its restore, repair, or conservation. I will post on Chickenhistorynow and Victorian Bookbinders facebook, mainly as pictures with a little commentary, and Trewalla.com.au and vbg.net.au. with the longer descriptions. The video version is on the VBG facebook page, and I hope the audio will follow.
 001 front spine and cover_z
 001 pb1 rear spine edgetaped_z
 001 pb1_z
 001 pb1a1 spine cover_z
 001 pb1a_z
 001 pb1b_z
 001 pb1c splits_z
 001 pb1d sections_z
 001 pb2 rear board and loose last section_z
 001 pb2 v font hinge_z
 001 pb2_z
 001 pb2v front board off_z
 001 pb2v front ep_z
 001 spine inside_z
 001 spine jap lining_z
 001 spine lined jap_z
 001 spine outside_z
 002 rear cover removed showing tapes_z
 002 rear section_z
 002 IMG_0011 spine lining_z
 002 pb3v covers off spine_z
 002 pb3v removing spine glue_z
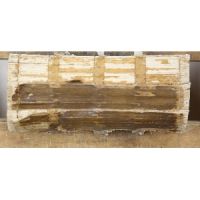 002 pb3v showing tapes_z
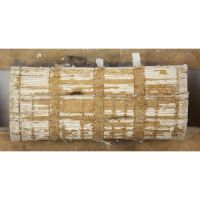 002 pb3v tlining removed_z
 002 pb4 v tapes out_z
 002b 025A7957 old holes_z
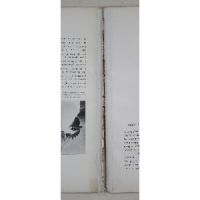 003 IMG_0001 cloth reinforced fault_z
 003 IMG_0001 taped pages_z
 003 IMG_0001 tapes join with plate_z
 003 IMG_0001_3 old sewing holes_z
 003 IMG_0001_sewing machine holes_z
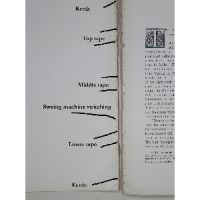 003 IMG_0001stitching_z
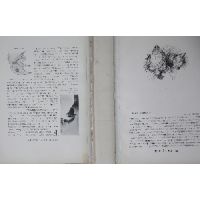 003 IMG_0002 tape separated_z
 003 pb3v section gap_z
 004 IMG_0002_3 oversewn removed showing all the holes_z
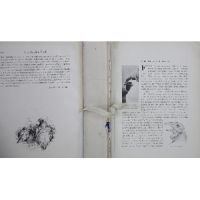 004 IMG_0003 removing cloth_z
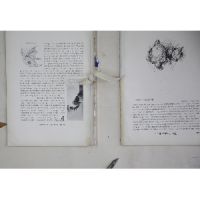 004 IMG_0003_1 removing tape_z
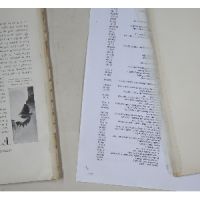 004 IMG_0004 jap tissue repair_z
 004 IMG_0006 jap tissue page join_z
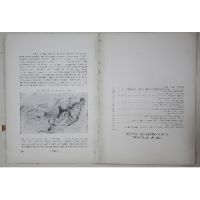 004 IMG_0006 jap tiuuse join_z
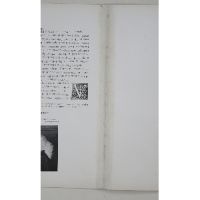 004 IMG_0007 another jap tissue page repair_z
 004 IMG_0016 third div tape_z
 004 IMG_0019 2nd div taped_z
 004 IMG_0024 peeling back tapes_z
 004 IMG_0025 tape removed showing loose spine_z
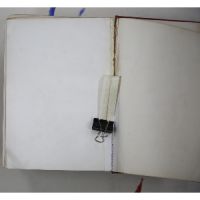 004 pb3v section repair tape_z
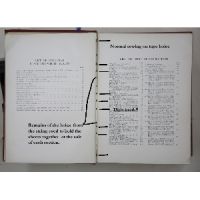 004 pb3v section split_z
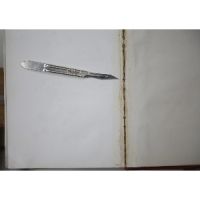 004 pb3v tape removed_z
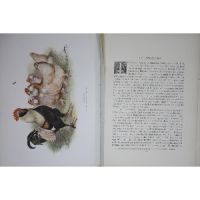 004 pb3v_001_z
 004 pb3v_002_tissue_z
 004 pb3v_003hinge_z
 004 pb3v_005_tissue_z
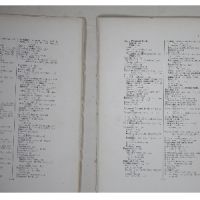 004 pb3v_006_separated sheets_z
 004.5 pb3v _006_5sections stacked stacked after fix_z
 005 pb3v setup for sweing tools_z
 005 IMG_0001 section wrong stitching_z
 005 IMG_0002 wrong folds_z
 005 IMG_0003 sewing position_z
 005 IMG_0004 alt stitch line_z
 005 pb3 old holes_z
 005 pb3v 2nd section_z
 005 pb3v asection ends_z
 005 pbv3 old holes and new sectios_z
 005 pbv3 square up_z
 005 pv3 025A7977 light backing_z
 005 pv302 025A7975 light animal glue_z
 005 pv303 025A7976 first rounding_z
 005 pv304 025A7979 pipe rounder_z
 005 pv306_z
 005 pv307_z
 005 pv308 025A7983 heavy scrim hot glue_z
 005 pv309 025A7986 hollow_z
 006 025A7993 boards lined_z
 006 025A7994 boards_z
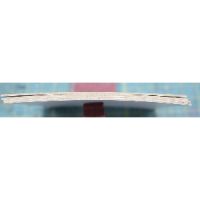 006 025A7995 boards curved_z
 006 025A7996 boards sanding_z
 006 025A7997 boards sanded_z
 006 025A7998 check squares_z
 006 025A7999 boards placed_z
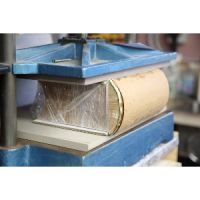 006 025A8010 press unril dry_z
 007 025A8013 leathe cut_z
 007 025A8015 pasted corners_z
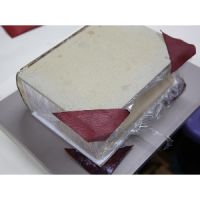 007 025A8017 corners placed_z
 007 025A8024 corners finished_z
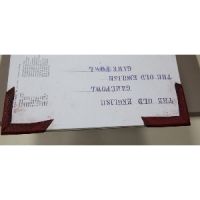 007 025A8025 corners inside_z
 025A8026 bw showing divisions_z
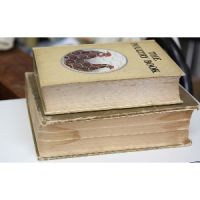 025A8027 2 vesrions_z
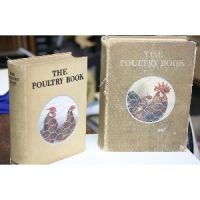 025A8028 2 versions different sizes_z
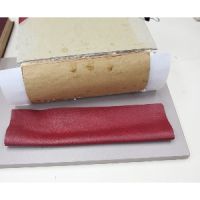 025A8029 leather spine_z
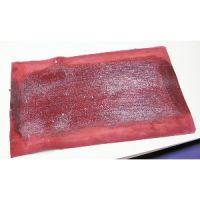 025A8030 spine pasted_z
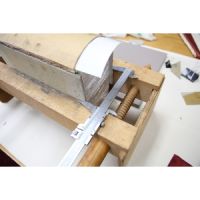 025A8031 spine clamped and measured_z
 025A8032 spine clamped_z
 025A8033 leather placed_z
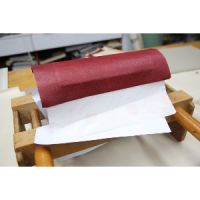 025A8034 with silicon release_z
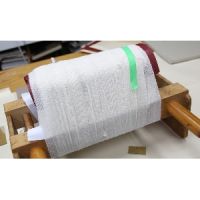 025A8035 wrapped_z
 025A8036 sides glued_z
 025A8037 working head caps_z
 025A8038 tie headcaps_z
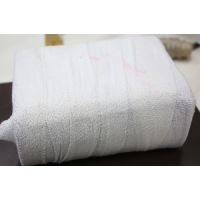 025A8039 wrap_z
 025A8040 check head caps and adjust_z
 025A8049 cloth sides_z
 025A8050cornes_z
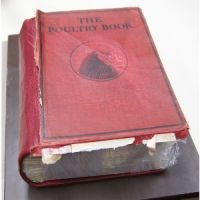 025A8051 old cover_z
 025A8052 old cover and embossing_z
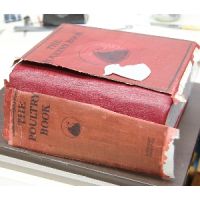 025A8053 spine and cloth_z
 025A8062 infill boards_z
 025A8063 cover trimmed_z
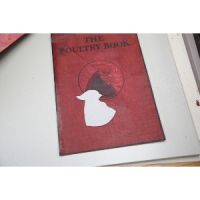 025A8064 cutout_z
 025A8065old glue_z
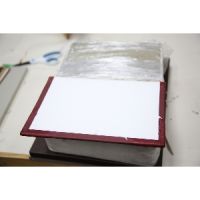 025A8090 lining finish_z
 025A8092 end paper down_z
Description.
The Poultry Book by Many Expert American Breeders and Harrison Weir FRHS under the editorship of Professor Willis Grant Johnson and George Brown Published by Doubleday Page and Co 1905, often referred to as the Poultry Book by Weir, Johnson and Brown. I will include the details of the illustrations, colour plates, pages per division, sections, and sections per division, as I dismantle.
This is the three volumes in one Poultry book Harrison Weirs our poultry American edition with the input of American experts, It was issued in parts and came in several different binding. The best binding was the three volumes bound as 3 separate volumes. The sections were issues at regular intervals, (how often) and when each volume was complete the owner had the choice is use their own binder, to make cases or to but a premade case to add to the sections, with a local binder doing the assembly work. These was an option at the end to buy a case for all three volumes, a cumbersome solution and a relatively small number were bound in this way. The remaining bindings were often damaged by the pure weight of the book. However today the 3 volume sets are rarer, so there is some pressure to “restore” to look original. To conserve sometimes means put it all in a special storage box with all the bits that may have fallen off, and just keep them, or in the case of a really rare book rebind exactly the same with the same materials, same methods to recreate the original work. For me to restore this book will mean to not do some works which will make the book serviceable. So I am aiming for repairing the book(s) to be readable and so they will remain as one for a long time.
The Faults as best I can describe.
1/ Obviously the cloth of the spine is damaged and only connected by strips if tape. The lining from inside the spine is missing, with just the cloth cover remaining. I suspect a hollow spine was originally in place but it is missing. The cloth of the spine is very faded and damaged.
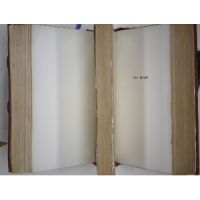
2/ The book separates at each of the sub sections. These have separated because of two faults. One, the books were not opened properly. A new book must be opened correctly section by section, especially one as big as this. This ensures the stresses trapped in the spine at binding and gently loosened and the books is allowed to open gradually. If done correctly the book (same for any book) will survive many more uses that one casually opened somewhere. This big set has been dropped open at the junctions of each of the book sections. The opening of such a heavy book by simply allowing it to drop open, causes the spine to split at that opening location. In this case the book has been dropped open at the junction between 1 and 2 and the junction between 2 and 3. An attempt has been made to and cloth joints to cover the obvious cracks, and that simply moves the problem to an adjoining section. In addition, the first section of each of the volumes has been oversewn to try to create a stronger joint at these breaks but again it shifted the stress somewhere else,
3/ In addition once the sections were moving separately it put a lot of stress on the thread sewing the sections together. As each part of the book moves away from its neighbour, the sewing thread has been moving back and forward causing the sewing holes to be enlarged, and the threads have almost worn through the spine tapes which hold the boards in place, as well as the actual sections which now must be repaired.
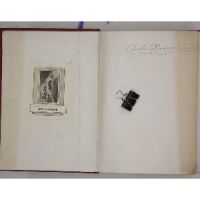
4/ The boards are covered in red cloth, now very faded, and the corners of the boards very badly damaged under the remains of the cloth sides. To use or not reuse the boards that is the question. I am leaning on the side of replacing with a heavier board. The front cover on the outside is quite wrinkled where the cloth has delaminated from the board, on the inside the end paper was lifted and replaced after another clumsy repair, and is not glued down well but wrinkly. Top front corner very crushed.
Dismantling the book
1/ Start dismantling the book with an initial plan to locate and repair all the faults in the book block. Then decide on the boards and cover issues later.
a/ Remove cloth spine cover, there is very little spine lining attached to the worn cloth.
b/ Remove all the tape from the front and rear joints.
c/ Carefully remove the boards without damaging the folds of the paper page sections.
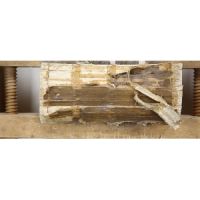
d/ Using thick paste soften the glue of the spine. This book is of the vintage of the animal glue on the spine, and removal involves softening the glue with wheat paste leaving it for a little while, and the peeling away the old glue and end linings that remain.
e/ Cut all the threads that hold the folded page sections onto the tapes. Remove the tapes and carefully separate each section, removing the reinforcements that have been added in an earlier repair. As it turns out these were pasted in place and a very gentle use of a kitchen knife and some tweezers allowed removal with almost no paper loss.
f/ Apply a small amount of paste to the spine, being careful not to get moisture into the ends of the folds. It will make water marks in the sections and there are already evidences of moisture effecting the spine. Remove the remains of the lining materials and glue.
g/ Dismantle the spine, lifting each section open at its centre to expose the thread, and cut the thread removing the section. Ensure all pieces of old thread are removed. Measure a piece of thread thickness so a similar thread can be used in the repair. (.6mm)
h/ Stack up the sections ensuring that no moisture in the end of one section is left sitting in the middle of the sections. I use some silicon release paper between each section to avoid the possibility of a small glue spot sticking as the stack grows. (a good binder will never have any odd spots of glue!!)
g/ Don’t rush.
Repairs
1/ The front end papers are damaged, remove.
2/ The font and rear sections are damaged in the gutter, repair with jap tissue.
3/ New end papers, z double sheet sewn in second cold.
4/ A couple of sections were reinforced in gutter with Japanese.
5/ The first join between divisions book 1 and 2 has a number of sections damaged by movement making the sewing hole over large. Repair with jap tissue. 1 section is glued across the old sewing holes, so tissue reconstruct for sewing. The end paper of the second division is damaged by the movement, and the gutter of the first section of the 2nd division was pretty ordinary reinforced.
6/ The join 2nd and third division has 2 sections and the end papers requiring reinforcement and rejoining. The resulting section is a but thick but will be double sewn.
Resewing of the block.
1/ .2mm thread to minimize the swell on such a big block. Hammer down well.
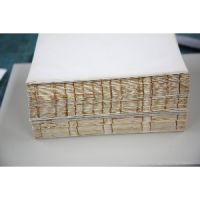
2/ The stacked sections before sewing reveal that the first 2 divisions had been sewn with a different sewing position. As always double check the section order during resewing.
3/ Sew each section. In some sections where there is wear that does not warrant guarding, so they are sewn in sewn all along. Not all sections, as the swell would be difficult but on average about 1 in every 5 and a couple of extras close to the division joins.
4/ Take care to ensure all the sections are in order, reasonable tension but not too tight making rounding difficult.
Gluing up the Block
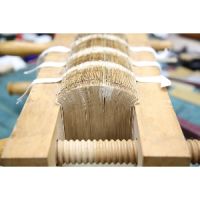
1/ Check the foredge is straight, and lightly animal glue the flat rear spine. This is to allow and slight issues with the thicker section to build out the back rather then push the smooth front out of alignment.
2/ Check top and bottom edges are straight and flat on the face. Check the clamp faces are parallel before gluing. Glue the sections but not the tapes
3/ Wipe off all the extra glue with the heel of the palm. I have used hot glue as this is easily softened later by the addition of a little moisture in paste. On a big heavy book like this one, its easy to get it out of alignment, so the animal glue allows for easier realignment compared with EVA
4/ Allow to dry.
Round the back.
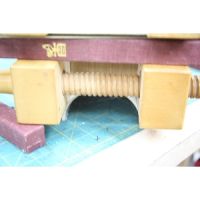
1/ Clamp up the block with the foredge correctly curved making sure that the curve is smooth and straight. I use a pvc pipe to get the foredge curve.
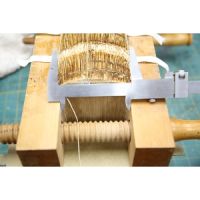
2/ Then clamp up the shoulders. Check head and tail are square, and straight, foredge smooth and make sure the edges of the foredge are aligned. Clamp tightly, measure the head and tail width to ensure they are the same.
3/ Carefully and gently back the book to produce shoulder suited to the heavy boards. Its only a gentle not an aggressive backing. Sharpen the shoulder a little to allow for the with of the boards.
4/ Once satisfied its all straight and nice shoulders , reglue the spine still with animal hot glue, pressing well into the sections. I could have and probably should have backed a little firmer and sharpened the shoulders a little more.
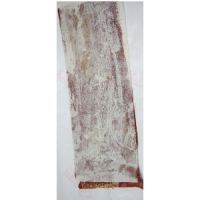
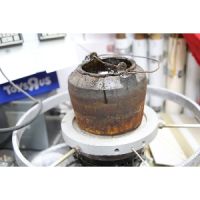
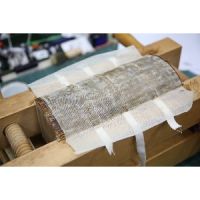
5/ Use thick long grain jap tissue as spine lining to assist flexibility. Animal glue.
6/ Make a hollow from heavy craft, one on 2 off. Attention to grain. Animal glue
7/ I used cheap head bands. They should have been heavier for the weight of the book.
8/ Leave clamped to dry.
Make boards.
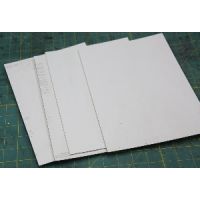
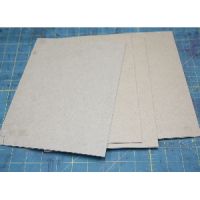
1/ Cut the boards for squares of 6mm, three boards for front and 3 for rear 2.2mm boards. Cut the boards to form a shoulder at the hinge.
2/ Mark on the boards, front, rear, top and foredge, and label the boards, inner, middle, and outer.
3/ Sand the outer boards to taper to the edge and about 30mm wide. Avoid sanding the head and tail right to the hinge but leave thicker at the hinges to allow for the back cornering and strength in the corner. This will give a thick board to carry the weight and yet look a little lighter because the edges are tapered. Smooth the taper, so there are no dips and bumps.
4/ Line the inner side of all boards with paper correct grain, then press all. You will see the lining paper pulls the boards into a slight inward curve, so that when finished the curve will hug the book. Wrong grain in the board, or paper or the order will result in outwards pull and an ugly opening book.
Attach Boards
1/ Wrap the block in cling wrap. I insert a 1.5mm loose spacer card under the wrap to provide a small air space when the lining is finished. Sit the block on a pressing board with the board right up to the shoulder. Start with the rear board.
2/ Align the inner board (paper inside) under the tapes and scrim with correct squares, a weight to hold in place. Double check the squares.
3/ Glue the tapes and scrim onto the board without disturbing the squares.
4/ Glue out the middle board on the paper side, carefully move the weight and align the board carefully. Now the scrim and tapes are in between the two boards. Rub down with folder
5/ Glue out the outer board, on the inner paper inside, align carefully. Rub down with the folder.
6/ Lift the pressing board, and book up without moving the alignment of the boards and place in the press.. Place a second pressing board on top, aligned with the edge of the shoulder, check all is still aligned and press firmly. Leave for a few minutes and check again the alignment.
8/ Leave half hour in the press to dry, then do the other boards for the front. Make sure the edges of the boards are the same for rear and front board.
9/ Press overnight.
10/ Back corner the spine edges of the boards, and slit the top ends of the hollow to ensure the head caps can slide into the hollow.
11/ Sand the edges of the made boards smooth and remove the sharp corners.
Smooth Spine.
Often the hollow would be lined on top with multiple layers of thick paper and sanded to ensure a completely smooth spine. It makes a nicer finish with smooth leather spine. However, I find it also makes the spine stiffer and on a heavy book like this maybe not the best for opening. I have opted to skip this step, to keep the spine more flexible but leaving the leather thicker. So the finished spine is a bit uneven.
Covering.
1/ I have chosen to use Morocco goatskin in a deep moron, of similar colour to the book cloth they were originally bound in. I have left it quite thick as the book is heavy and the spine will be under considerable strain from the weight. I addition I am binding the corners in same leather, making it a “half bound” book. The book will look a bit bulkier than the original, but if you remember the early discussion, the choice is between physical strength, repaired, if it bound to be read, or light and neat and restored to original if it to end up on a shelf and never to be used.
2/ I have cut the rear spine leather and the 4 corner pieces. The edges are pared to a very thin edge, for the spine and about .5mm for the corners. This will allow for thin infill sheets if the boards allow the leather to pull them into a curve, and tapes the leather under the cloth on the sides of the book
3/ Paste up the corners, face each pair of corners glue inwards and allow the past to soak into the leather. Take them apart after 10 minutes and re-paste. Mark the corners where the edge of the leather will finish, the place the first two pieces in place, re-paste if they have become dry. The moisture from the paste will allow the corners to be moulded and trimmed to shape. Check both are in the right place, and the cut corner properly aligned. Turn the book over, and carefully repeat. I find its good to go this on a melamine covered pressing board. Part because you can rotate the board and not the book, the melamine will rotate easily on most surfaces. Carefully turn the book over and do the front corners. Allow to dry for at least couple of hours or overnight.
4/ Next morning, check the leather is the correct size for the spine, that all the paring of the long edges is at least 10mm wide and transitions from leather thickness to zero at the edge. Use the fingers slid along the edge to detect ant irregular lumps and bumps. Make sure the paring on the head and tail is correct no bump lumps and tapers to zero on the turn in. I don’t pare the headcaps super thin on a book like this as they need to be a bit stronger.
5/ Mount the book in a press so that the book can be wrapped with bandages. Ensure the press is uniform in opening at both head and tail, and I usually add a blank clean sheet of paper on the cheeks of the press so the press won’t mark the leather corners.
5/ Paste up the area of the spine leather that is a little larger than the size of the hollow. Fold the leather pasted face inwards and leave for 20 minutes.
6/ Open and re-paste ensuring there are no hard lumps of semi dried paste or other foreign objects on the leather.
7/ I add a cut piece of silicon release paper into the hollows so they don’t get stuck shut and carefully place the leather central with the same width across the sides and head and tail overlaps are equal. Rub the leather onto the spine, up to the edges of the hollow, being careful not to mark the leather with tools or finger nails.
8/ Use stretch bandage to wrap the spine, being careful to wrap firmly but not mark the leather. Allow to dry for 30 minutes or so.
9/ Remove bandages, and paste up the remaining spine leather make sure the joints are well pasted, though I often add a light coat of eva into the flexing joint area as well.
10/ Paste the inside of the turn ins at head and tail. Cut 2 pieces of cord to give some extra strength and bulk to the turn ins. Paste up the cord. This is the part that get damaged by incorrect pulling of the book out by hooking the finger over the head band.
11/ Rub down the sides, taking care not to put marks in the side leather.
12/ Sit the book up on pressing boards so the lower turn in isn’t crushed while working the upper turn in.
13/ Open the boards a little and roll the pasted cord into the fold of the head cap and slide the fold into the hollow. Slide the leather into the hollow until it is lower that the top of the boards. Carefully form the head cap to a neat structure.
14/ Turn the book over and repeat. It takes a bit of time and skill to get the head cap neat and at the right height. The head and tail caps should not touch the shelf when the book is standing up. A sheet of paper should slide under the head caps.
15/ Once the both are in place and the leather at the top of the boards is positioned correctly shut the boards on the leather, recheck all is in place. The paste does give some working time but also some time to pop open if not correctly positioned.
16/ Get a long piece of cord wrap the cord into each of the indents in the head caps and wrap around the book to hold the form of the headcap until dry. I tuck a piece of folded paper or light card under the cord to prevent marking the leather sides.
17/ Using the stretch bandages wrap the book, making sure the head bands remain in the right shape.
18/ After 10 minutes, roll back the bandage and check the head caps are correct in shape, without an overhang. If the book is stood on its spine piece of thick paper should slide under the head cap. The head cap should not be touching the shelf so to speak. Turn the book over and check the clearance of the other head cap. The paste will respond to a small amount of moisture (more paste) and can be adjusted.
20/ Rewrap with bandage and leave overnight. Then check.
Sides Infill
1/ Allow the leather to dry for a day or two. Check to see if the boards are bowing. The should hug the book block with a very slight inwards curve. However, if they curve outwards, the inside of the boards must be lined with bank paper, thin and hard. The grain much run head to tail. Trim to the height and width inside the turn ins. Paste the paper and allow to stretch, then place inside the board and rub down firmly. Allow to dry, repeat on other board in needed.
2/ If needed, infill the boards with a thicker paper to fill up the inside of the board to the level of the leather turn ins.
Cloth sides.
1/ Matching cloth sides. Cut the cloth to suit the side over hand by 20mm at top, bottom, and foredge.
2/ Rear board. Use divider to place a prick mark about 3mm from the edges of the spine leather and the edges of the corners.
3/ Align the cloth with the two prick marks on the spine leather. Place a weight to hold the cover material in place. A small pencil mark on the lower end of the spine side of the cloth gives an alignment mark for placement after gluing.
4/ Fold the cloth on the corners to give a cut line for the corner leather. Remove the weight and cut off the excess cloth.
5/ Check the cloth, when placed back on the side, covers to all the alignment pricks on the leather.
6/ Glue out the cloth, I used Eva glue. Carefully place to meet the spine pricks and the spine pencil mark. Check the corner alignment is correct before rubbing down well with folder, use a piece of shiny paper to aid the rubbing down with low friction of the folder.
7 Open the board and support it on a padded block. Fold over the cloth, rubbing the turn in with the fingers and then a folder. Trim any internal excess. Check the leather turn ins of the corners are a nice straight line, trim if needed.
8/ Repeat for front board.
9/ Leave for a few days to dry completely checking to ensure the boards do not develop a curve. On these thick boards that did not happen, but always be aware of the possibility.
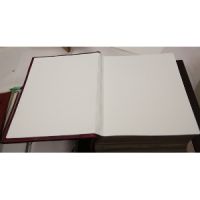
Putting down the endpapers.
1/ Check the material of endpapers to ensure that once pasted the swell of the paper will not leave the papers longer than the block.
2/ Remove the waste sheet of the made endpapers .
3/ These endpapers will be put down with the board open. Support the board open with a block.
4/ Paste the end paper, and allow to stretch for 1 minute or so. Make sure there are no lumps or hairs on the pasted paper
5/ Drop the board closed onto the end paper, then open fully and smooth down the paper with the folder on a shiny sheet, to avoid any marks on the inside of the paper. Check all is clean and straight as this can’t be changed later.
6/ Leave open for 24 hours, then closer the board and repeat the other ep.
7/ The block is now completed
8/ Carefully open the boards and check all is ok.
9/ Allow the book to sit and fully dry for a few days before opening.
Additions.
1/The original book plate was removed and the signature removes from the old ep and now is glued in place on the new ep.
2/ To remove the weight of the heavy book block from sitting on the spine hinges I will make a support shoe so while sitting in the shelf, the book weight is supported and the hinges relieved.
The Decisions of the Covers.
The original cover cloth is very faded, has some glue marks from the spine taping. I have trimmed the cloth back to the black line on the cover. The question is do I add the cloth or make a new decorative front. The original has a 3D chicken head on the middle buffered out with a 2mm card.
The original spine is even worse, with some of the lettering missing and even more faded. So to reuse the original parts or make new ones.
I sought to retain the texture of the Morocco goatskin for the back and corners, and have been successful in that. It seems a pity to cover up the leather with the old cloth. So email me with your reasons which it should be. And if you like it on FB click the like button.
Mistakes.
1/ I am an amateur binder and I still make rookie mistakes. In this case, in the desire to not have hinges too tight, I have hinges rather rough on the inside, and showing through the end papers. Ideally it should be a tight sharp joint but its shows the mistake.
2/ The shape of the spine is good, but I think a bigger end band on the spine would have suited the heavy weight of the book.
Opening The book.
Now for the first time since wrapping the book, open the book. It is important that this process be cone correctly. A cautious and correct opening of any book for the first time will determine the flexibility of the book for like. A rough and inappropriate opening can damage the book for life. In particular opening a book to the middle and stretching it widely, especially on a thick and heavy book like this one. Sit the back of the book on a padded surface. Gently drop the rear board open flat while holding the book block closed. Ease the board open until is it at 90 degrees. The drop the other board open and again gently ease it to 90 degrees. Then take a small group of pages and open them to the board with a gentle smoothing, repeat for the other side of the block. Proceed a few pages at a time front and then back slowly working to the middle of the book. This will allow the stretching of the spine components and allow the stresses of the block to be distributed. This greatly extends the life of a book especially a reference book and a big heavy one like this one.
Opening to one place and forcibly by pressing the book flat may well cause a permanent fault at the place when the book is opened and cause the spine to split at that location. Many family bibles split like that as they were a ceremonial item and most often opened to the location of the family history which occurred often between the Old and New Testaments. Half a dozen visits there and nowhere else and the spine fails.
